|
|
Lighting Control by Scary Terry |
|
|

|
|
A few years ago, I was building a prop which was to be
controlled by a BASIC Stamp 2, and decided that I wanted to include some
lighting control with it. I did a web search for a means to do this and came
up with very little, there were no commercial
controllers, or at least none within my budget, and very little other
information. Fortunately, I found one great post by R. Turley on the Parallax
Forums detailing a well thought out system for the control of lights
using a BASIC Stamp. While the circuit was relatively simple, the
construction, using numerous 20 pin ICs, was going to involve a lot of
wiring, but I took on the challenge and was very pleased with the results. At
right is a picture of the four channel controller I built for about $25. (You
can click on any of the pictures for a larger image.) |
|
|
|

|
|
While this lighting controller suited my needs just fine,
I realized that most home hobbyists aren't willing to build something as
extensive as this. I mentioned the need for light control to my friends at EFX-TEK and learned that they were already
in the planning stages of developing a controller to go along with their
Prop-X line of controllers. |
|
|
|
|
|
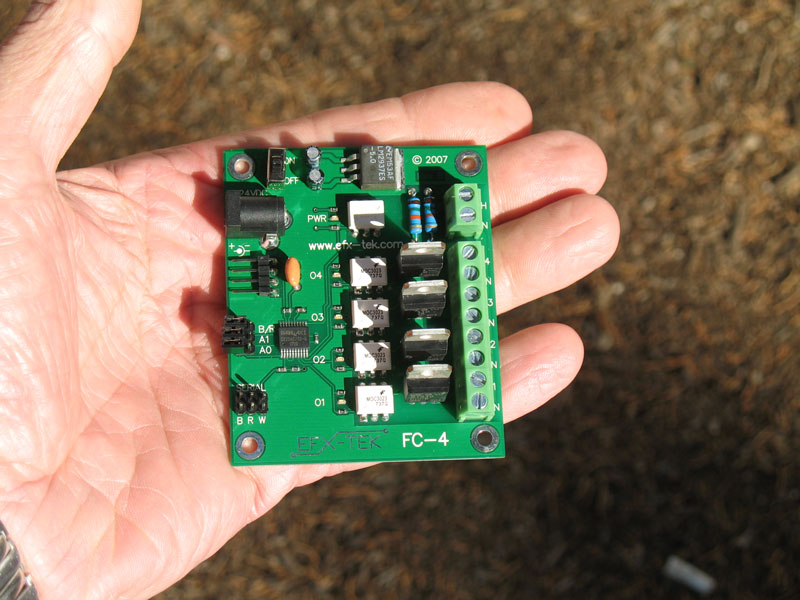
Just recently (Dec. 07), EFX-TEK started selling the FC-4, a full function four
channel lighting controller and I think it's one of the coolest products to
come along in a long time. And at $90, I think it's very reasonably priced
considering all the time and effort I put into building my own. As you can
see in the picture to the left, it's a fairly small unit but has numerous
functions which are fully detailed on the EFX-TEK website. While it's
designed to work directly with one of their Prop-X products, since it's serial controlled, it will work with just about any
microcontroller (BASIC Stamp, SX, PIC, etc.) or with the addition of an serial inverter,
can run directly from a PC. |
|
|
|
I haven't put the FC-4 into a project yet but have played with it using a Prop-2 controller. As you can see in the photo to the right, the connection between the Prop-2 and the FC-4 is just one jumper cable. Because the FC-4 will be connected to 120 volt power and has exposed terminals, you really don't want it flopping around so I strongly recommend that before you do any experimenting, that it be attached to a board or otherwise secured. |
|
|
|

|
|
The FC-4 test programs for BS1 and BS2 available on the
EFX-TEK website are a great way to get started in learning to use the FC-4.
I've had no formal programming training and don't program very often, so it's
very helpful to have some place to start. I usually begin slowly, making one
change in the program at a time to see what it does before I continue on.
Once you get the lighting effect you're after, you can always cut and paste
the appropriate code into your main project code. |
|
|
|
|
|
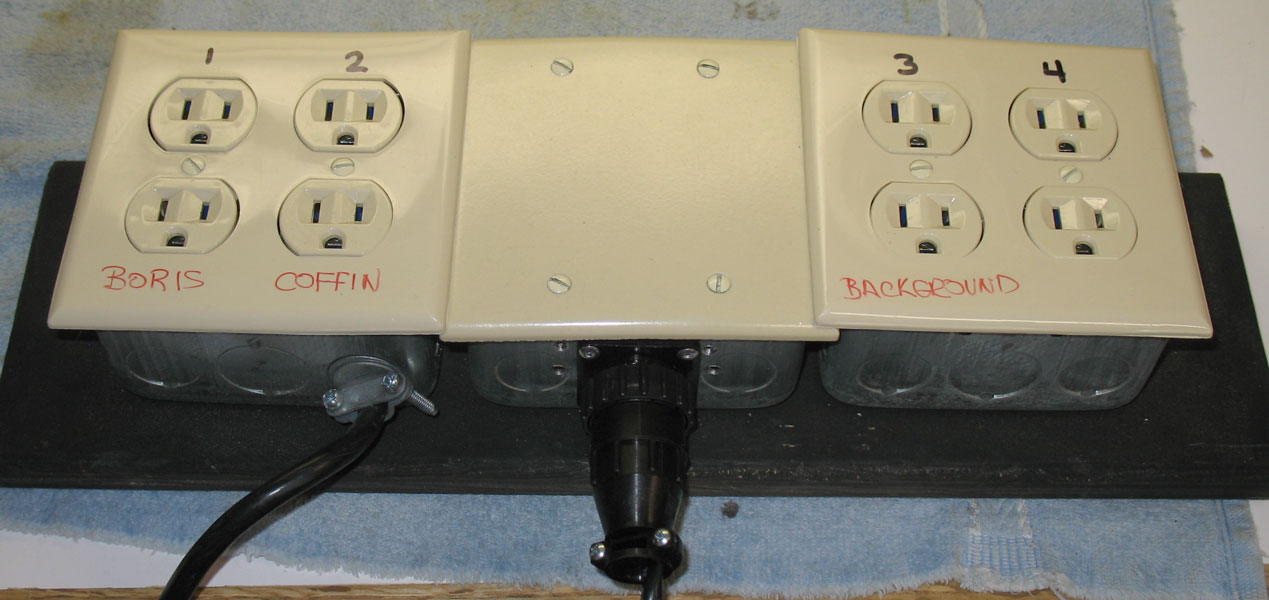
For the lighting controller I originally built, I put all the "high voltage" components into a closed box for safety. Since the FC-4 involves high voltages, I recommend that it be installed in your project where it can't accidentally be touched. As you can see from the picture at left, it fits nicely into a two gang electrical box. (If you're going to mount it in a metal box, be sure to use insulating standoffs so that the circuit board doesn't touch the box.) Below is a picture of how I mount my lighting connections. The center box houses the high voltage control circuitry and feeds the outlets mounted in the outer boxes. AC power enters through the cord on the left, the cord lower center is the connection to the low voltage control circuitry. These boxes and fittings are inexpensive and available at your local home center. |
|

|
|
|
|
|
|
That's it for now, I'll have some
more information once I have a little more hands-on time with the FC-4 and
use it in a project. |
|
|
|
|
last update 11/2013 |
|