Using a wiper motor in your Halloween projects page 2

  Wiring the motor      
 

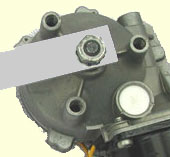
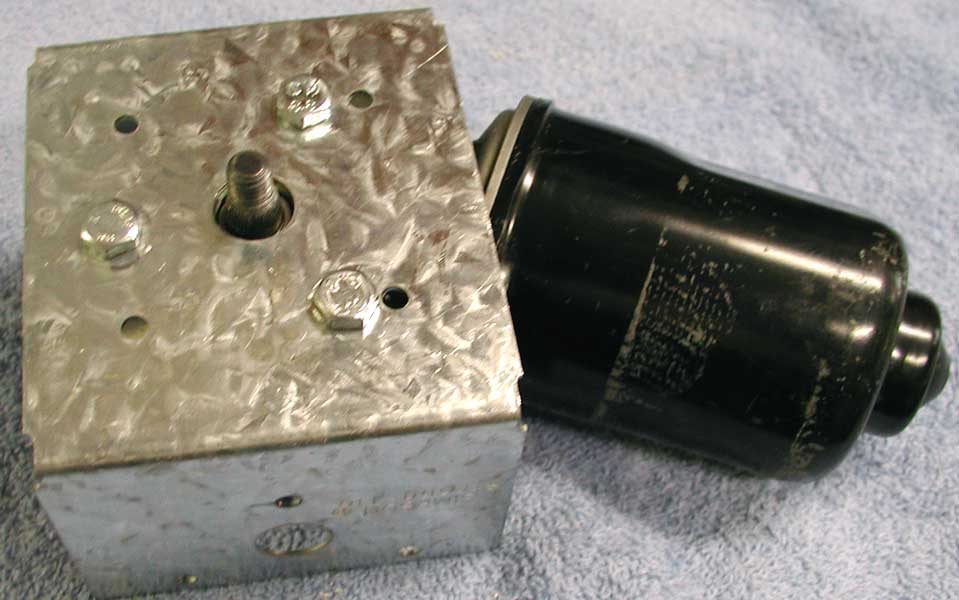
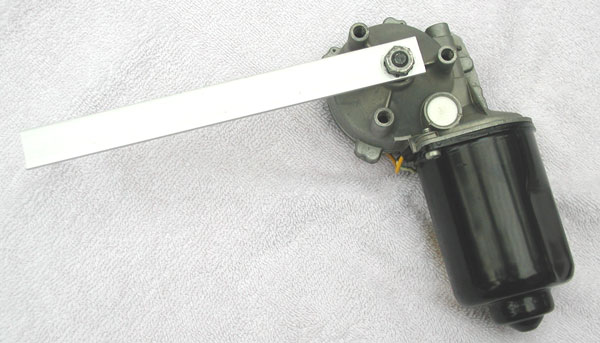
The Saturn wiper motor has a block with 5 electrical terminals. One terminal goes to ground (Common), one is for high speed, one low speed and two for a parking switch. It's important to note that the Common terminal is connected to the motor casing. This could be a factor if you mount the motor to a metal chassis or have other exposed wires in the vicinity of the motor.

The parking switch is used to bring the wiper blades to their "parked" position when used on a car. During motor operation, the two terminals are connected to each other about 90% of each rotation. They open during the other 10%. I haven't used this function, but it could be used to "flash" a light or possibly in conjunction with a microcontroller to count revolutions and make something happen every Nth revolution.


I cut away the plastic casing over the terminals so I can solder wires to them.

The table below gives hookup information for the Saturn motor.


This type of crimp-on connector in the 3/16" width works well without soldering.
 
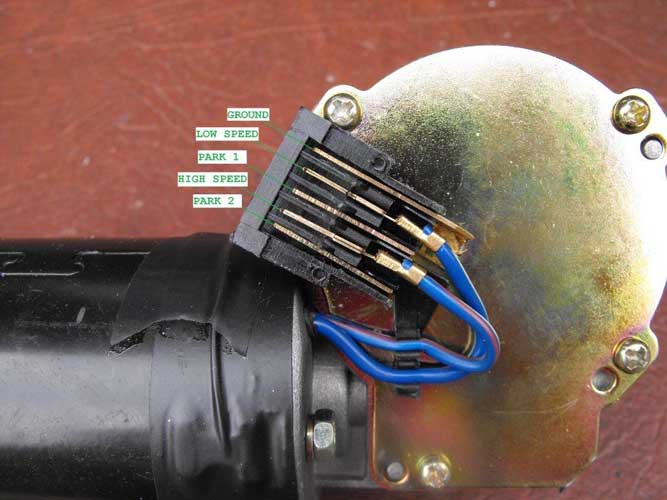
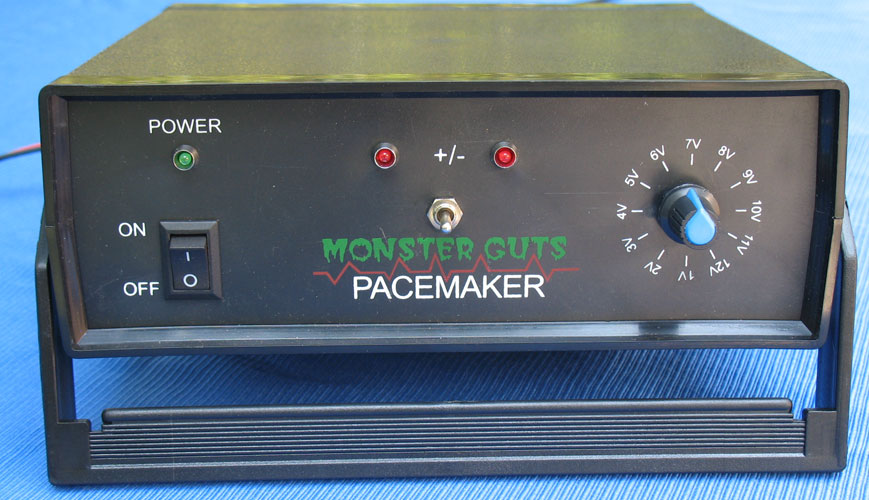
Here's a "pin-out" for the Monster Guts motor thanks to Mark M. Click on the picture for a larger image.


The chart to the right gives approximate speed, current draw and power supply hookup information for counterclockwise motor rotation. As an example, if you want the motor to rotate at 70 rpm, hook the positive (+) connection of the power supply to the High speed terminal of the motor and the negative (-) connection of the power supply to the Common terminal on the motor.

You can reverse the direction of rotation by reversing the power supply connections (use caution as the motor casing is tied to Common).

NOTE: This motor was listed by many sellers as having two speeds, 106 and 41 RPM. Technically, this information is incorrect as the motor was not designed to be run at 106 RPM. It can be wired to run at that speed, and I give that information at right for reference only, but I cannot recommend it.


RPM
Current draw**
+ pwr supply
- pwr supply
41
0.9 amps
Low speed
Common
70
1.6 amps
High speed
Common
106*
4.0 amps
High speed
Low speed

*I list hookup details for 106 rpm as information only, I can't recommend this speed (see note at left).

**No load current. These numbers will increase as the mechanical load increases.


  Speed Control This table shows some approximate motor speeds I've obtained by varying the voltage going to the motor using two different wiring configurations. As voltage goes down, so does the motor torque.
Voltage
High
Low
12
70 rpm
41 rpm
8
42 rpm
28 rpm
5
26 rpm
16 rpm
3.3
13 rpm
10 rpm


One way to control the speed of the wiper motor is with a motor speed controller. Here's a link to a motor speed controller in kit form. This link talks about the advantages of using a speed controller verses varying the voltage (series resistor). I've tried this controller (shown near right) and it works well. The only negative comment I have is that at lower speeds, the controller makes the motor "sing", in other words, it makes the motor a little noisy (at least that's what happened on the one I tried). This kit is still available, just do a search for "kit 67 dc motor speed controller".

A couple of other sources for motor speed controllers are Amazon and QKits.


Another speed control option is a device like the one shown at left designed to work with a microcontroller like a BasicStamp or Arduino. This one is an HB-25 from Parallax. It takes just a single speed control pulse from the microcontroller and will maintain that motor speed, from very slow to full speed, until updated. I have used this one and its performance is excellent.  
Above is a demo I set up showing how the wiper motor can be fully controlled using the HB-25, an EFX-TEK Prop-1 controller and a 12 volt 1.5 amp wall wart. Please note that this setup might not work for all circumstances. Since this was for a demo, the motor had no load, which is why I could get by with a 1.5 amp wall wart. With a load, the motor is capable of drawing considerably more current. Also noise from the motor could interfere with the proper operation of the Prop-1 when the two are on the same power supply. For permanent installations, it's best to use two separate power supplies, one for the Prop-1 and the other for the HB-25/motor. Click here for more info from the EFX-TEK discussion forums which includes some sample code.

  Monster Guts is selling a unique wiper motor power supply that offers 12 voltage steps, from 1 to 12 volts, to vary the speed of the motor as well as a switch to change motor direction without having to switch wires around. I've tried it using the Trico motor, the Monster Guts motor and a couple of other 12 volt motors and it works quite well. As expected, below about 5 volts the motor torque really drops off, but above that, this supply provides plenty of current to keep a motor running at full strength. More info on the Monster Guts website.

  Mounting  
 
There are three mounting holes on the gear housing of the motor. These require 6mm screws. I imagine they could be tapped to accept 1/4" screws, but I find it easier to purchase metric screws from the local hardware store.
I normally mount the wiper motor using steel angles or aluminum bars bent as needed. The picture at left shows the mount I use in my Kitchen Sink Coffin. Initially, I just used the angled aluminum bars, but it wasn't sturdy enough so I added the angle stock at the bottom.
4x4 post caps make great universal mounts. At right and below is a Simpson BC40, available in most hardware and home stores for a couple of bucks


Mechanical Linkages

There are numerous ways to connect the motor mechanically to your project. It comes with an attached arm (see picture at top of page one) . This arm is easily removed and the ball end can be drilled out (I find a 5/16" drill is just about right) to adapt it for other uses (see right). You can also make your own arms out of 1/8 x 3/4 aluminum stock (see below) available from most hardware stores.


Here's a link to a favorite page showing various linkage ideas: https://www.robives.com/mechs

 
Project Links
 
Rocking a chair
Witch Stirring a Hanging Cauldron by ScareFX
Axworthy Flying Ghost (bottom of page)
Kicking Legs
Making a coffin rock
Dancing Skeletons


Other Sources for Wiper and Gearhead Motors

All Electronics
American Science & Surplus
eBay
Electric Motor Warehouse
Electronic Goldmine
Fright Props (new motors)
Herbach & Rademan
HSC
MECI
Monster Guts (new motors similar to the Saturn motor)
MPJA
Surplus Center
Surplus Traders
Note: Most of the places listed are surplus dealers. Their stock of items for sale frequently changes and therefore I cannot give specific model numbers  

Back to Page 1

  Halloween Home last update 11/2019